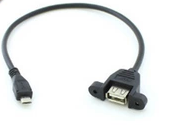
Micro USB Male to USB-A Female Car Dashboard Flush Mount Extension Cable
A micro usb dashboard cable brings a Micro-B device lead out to a flush panel socket on the dash. USB 2.0, 28 AWG data with 24 AWG power, black PVC jacket, 1 m / 2 m / 3 m. Bracket, screw nut and cap included; built to your cut-out and length.
Overview
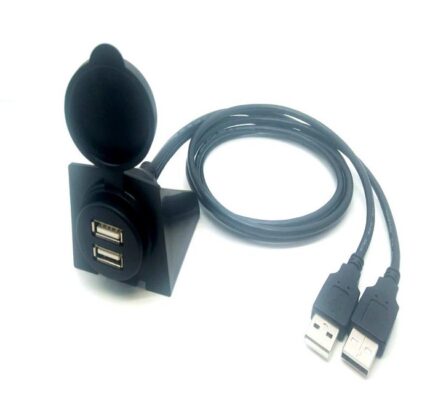
A micro usb dashboard cable does one job: it takes the Micro-B plug that would otherwise hang out of the head unit and moves the connection to a fixed socket on the dash. The Micro-B end goes to the device or to the head unit, the USB-A female end sits in a 28-30 mm round cut-out and is held by a bracket and a screw nut from behind. Data conductors are 28 AWG and the power pair is 24 AWG, which is the sensible split when the socket has to both sync and charge; the electrical contract both ends work to is maintained by the USB Implementers Forum. Black PVC jacket, 1 m, 2 m and 3 m stock lengths, and a cap that keeps dust and drink out of the socket when nothing is plugged in. The bracket is the part people underestimate: it is what stops the socket being pushed through the dash the first time someone jams a plug in one-handed while driving.
Key Specifications
| Connector A | USB Micro-B Male |
|---|---|
| Connector B | USB-A Female, panel mount |
| USB specification | USB 2.0, 480 Mbps |
| Conductor | 28 AWG data + 24 AWG power |
| Outer diameter | OD 3.5 mm / OD 4.5 mm |
| Jacket material | Black PVC |
| Cable length | 1 m / 2 m / 3 m |
| Mounting | Flush mount bracket, 28-30 mm cut-out, screw and cap |
| Application | Dash-cam, GPS, tracker, rear-seat tablet charging |
| Color | Black |
Why a dashboard is a harder place for a connector than a desk
A panel socket on a desk gets plugged ten times a week at room temperature. A dash socket gets plugged in the dark, at an angle, in a cabin that spends its life cycling between cold soak and solar load, while the whole structure is being shaken by the engine and the road. Those four things – temperature swing, vibration, condensation and blind mating – decide whether the installation still works after two winters.
| Condition | What it does | The detail that answers it |
|---|---|---|
| Temperature swing and solar load | Softens PVC, loosens an interference fit over time | Metal bracket and screw nut carry the load, not the plastic clip |
| Engine and road vibration | Works the solder joints and the crimp barrel | Stranded conductors, strain relief at the shell, cable tied every 150 mm |
| Condensation behind the dash | Corrosion on the contacts, tracking across the board | Drip loop in the run, no low point where water can sit |
| Blind, angled mating | Bent pins, cracked socket housing | Recessed, flush face; nothing protruding to catch a knee or a bag |
| Dust, crumbs, spilled drink | High resistance or a dead port | Cap fitted whenever the socket is not in use |
Flush mount or surface mount: what actually changes
Flush mount means the face of the socket sits level with the trim and the body goes through the hole, so nothing protrudes. Surface mount means a bezel sits on top of the panel and only the cable passes through. Flush is what you want on a dash because it cannot be knocked and it looks like it came with the vehicle, but it demands an accurate round hole. Surface mount forgives a rougher opening and is the pragmatic choice on a curved or uneven trim panel, at the cost of a bezel standing proud of the surface.
| Flush mount | Surface mount | |
|---|---|---|
| Cut-out accuracy | Matters – the flange has to land flat | Forgiving – the bezel covers the edge |
| Protrusion | Face sits level with the trim | Bezel stands proud of the panel |
| Best on | Flat dash trim, center consoles | Curved, ribbed or uneven panels |
| Snag risk | Very low | Higher – a bezel catches bags and knees |
| Rework | Harder – the hole is already there | Easier – the bezel can move |
Length and exit direction: pick both before you drill
Length is not a cosmetic choice. A 3 m lead in a cabin is 3 m of cable that has to go somewhere, and the usual answer is a coil behind the glovebox, which is where vibration turns into chafe. Measure the route, not the straight-line distance, and add slack for a service loop rather than ordering long and hiding the surplus. Exit direction matters just as much: a straight exit needs depth directly behind the panel, and a right-angle exit needs side room but saves you from folding the cable at the flange, which is where the conductors break.
| Install | Suggested length | Exit | Note |
|---|---|---|---|
| Dash-cam at the mirror, socket at the console | 3 m | Straight or right-angle | Route up the A-pillar trim, not across the airbag |
| GPS or tracker on the dash top | 1 m | Straight | Shortest run that still allows a service loop |
| Rear-seat tablet charging | 2 m to 3 m | Right-angle | Route under the console trim, clear of seats |
| Head unit to a blanking plate | 1 m | Right-angle | Check depth behind the plate before ordering |
Where a micro usb dashboard cable still makes sense
- Dash-cams and GPS units that still ship with a Micro-B power lead
- Tracker and telematics boxes hidden behind the trim, served by a visible socket
- Rear-seat tablet and phone charging on fleet and taxi vehicles
- Marine and motorcycle panels where a flush socket keeps spray out of the trim, see the Waterproof USB-C Panel Pigtail
- Truck sleeper cabs and RV panels, alongside the Dual Port USB Panel Mount
- Retrofits where the head unit end is fixed but the customer wants a proper socket, see the D-Type USB Panel Feedthrough
- Kiosk and self-service builds that use the same bracket, see our Kiosk and Self-Service Terminal Harness
Failure modes on in-vehicle panel sockets
The classic one is a hole opened with a step bit and finished by eye, so the flange lands on an uneven edge and the socket can spin; the first blind plug then pushes it into the dash. The second is a cable routed with no slack and tied hard to a moving part, so the strain lands on the solder joints at the back of the socket instead of on the jacket. The third is the cap: it goes missing in the first month, and six months later the port is full of dust and will not charge reliably. Drill with a hole saw at low speed, leave a 50 mm service loop behind the panel, tie the run every 150 mm, and specify a tethered cap if the cap is likely to wander.
What we treat as a target rather than a claim
What is listed here for Micro USB Male builds is the industry-standard definition, not a measurement we took on a finished part. What your assembly is built and verified to is what your drawing states, confirmed against the supplier datasheet before a quote goes out.
How to specify your build
- Cut-out size – 28-30 mm round is standard; confirm against your bracket drawing.
- Length – 1 m, 2 m or 3 m, or your measured route length.
- Exit direction – straight or right-angle, and the space behind the panel.
- Cap – loose, tethered, or open socket with no cap.
- Jacket – black PVC as standard; other colors on request.
- Panel thickness at the mounting point, trim and substrate included.
- Quantity and whether this is a prototype or a production order.
Workmanship and testing
For Micro USB Male builds the line runs to IPC/WHMA-A-620 Class 3 under ISO 9001, terminating 32 to 12 AWG. Every Micro build gets a 100% continuity and pinout check before it is boxed, and seal checking is quoted whenever an ingress rating is on the drawing.
RoHS and REACH declarations are provided per project together with the agreed test reports; the documentation scope is listed under certifications and compliance. If your drawing specifies a UL style, we build to that drawing and supply the UL reference with the shipment instead of substituting an equivalent. This assembly is built on the four lines covered under our assembly lines in Longgang, with nothing in the build handed to an undisclosed subcontractor. Related reading: our engineering review process. Any tooling we cut for this part stays yours, maintained in our own tool room under your part reference.
Custom builds and ordering
Micro USB Male prototype lots start from 1 to 50 pcs and ship in 3 working days. Production requires 500 pcs and runs 14 working days after sample approval. Tooling not already held adds around 10 working days. Your part number and labeling go on OEM and ODM Micro shipments, and we provide material certificates and first-article reports when asked.
Related panel and USB hardware
- D-Type USB Panel Feedthrough with Reversible A Port
- Dual-Port USB 3.0 Panel Flush-Mount Extension
- Flush Mount USB-C Receptacle, Threaded M21 Body
- Car USB-C Data Cable with Right Angle Plug
- Control Cabinet Service Interface with RJ45 and USB-C
Full ranges: panel mount cable, signal and data cables and custom wire harnesses.
Frequently Asked Questions
<div class="
For a related configuration, see the Single USB-A Female Car Dashboard Flush Mount Extension Cable with Waterproof Cover.
hkw-faq”>
Will a 3 m run still charge a tablet at full rate?
Length costs you voltage, not data, on a USB 2.0 run. The power pair here is 24 AWG, which is the right choice for charging; if the device still complains, check the source adapter before blaming the cable.
Can I fit it to a curved dash panel?
Flush mount needs a flat land for the flange. On a strongly curved panel either build a small flat pad behind the trim or take a surface-mount bezel that tolerates the shape.
What size hole do I drill?
A 28-30 mm round cut-out for the standard bracket. Confirm against the bracket drawing that ships with your order before you cut – a hole is not recoverable.
Is the socket sealed?
No. The cap keeps dust and splashes out of an unused socket, which is not the same as a sealed connector. For an exposed install, ask about the sealed pigtail versions instead.
| Connector A | USB Micro-B Male |
|---|---|
| Connector B | USB-A Female, panel mount |
| Cable length | 1 m / 2 m / 3 m |
| USB specification | USB 2.0, 480 Mbps |
| Conductor | 28 AWG data + 24 AWG power |
| Outer diameter | OD 3.5 mm / OD 4.5 mm |
| Jacket material | Black PVC |
| Mounting | Flush mount bracket, 28-30 mm cut-out, screw and cap |
| Application | Dash-cam, GPS, tracker, rear-seat tablet charging |
| Color | Black |