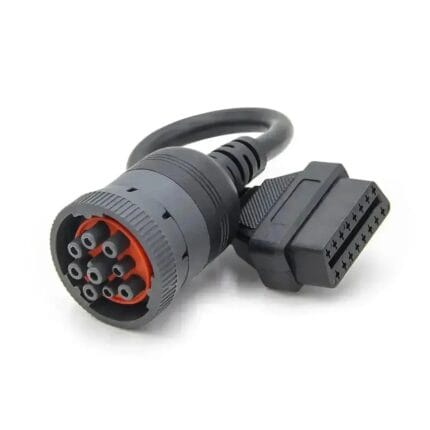

Vehicle Rear Camera Extension Cable, 4 Pin 5pin 6pin 8pin Dash Cam Extension Cable
A vehicle rear camera extension cable built for 4, 5, 6 and 8 pin M8 camera and monitor links: your pinout, your length, straight or right-angle ends, PVC or PUR jacket.
Overview
A vehicle rear camera extension cable is the run between the camera at the back of the vehicle and the monitor or DVR at the front, and it is usually the first part of the system to fail. It passes through a door grommet, a tailgate hinge or a bumper cavity, so it flexes every time a door closes and sits in road spray for the life of the vehicle. We build the 4, 5, 6 and 8 pin versions on the M8 circular platform to the pinout, length and jacket your installation needs.
Key Specifications
| Connector family | M8 series circular, to order |
|---|---|
| Pin count | 4, 5, 6 or 8 positions |
| Ends | Male to female extension, straight or right-angle either end |
| Cable | Shielded or unshielded, built for composite or analog HD video |
| Jacket | PVC standard; PUR for door, tailgate and engine bay runs |
| Length | OEM build to order, typical 0.5 to 10 m |
| Ingress | IP67 in the mated state on sealed M8 variants |
| Marking | Your part number printed on the overmold |
Which pin count your camera system uses
Pin count tells you the shell. It does not tell you the pinout, and that is where most replacement orders go wrong. Two 4-pin cameras from different makers rarely agree on which pin carries video, so we wire to the pinout you send rather than to a chart. In broad terms, this is what each shell size is carrying on the vehicles we see:
| Pin count | Commonly carries | Where you normally find it |
|---|---|---|
| 4 pin | Video, video ground, power, power ground | Single camera to monitor, no audio, no trigger |
| 5 pin | Adds a shield or a spare conductor | Camera plus screened video return |
| 6 pin | Adds microphone or a trigger lead | Camera with mic, or reverse-signal trigger |
| 8 pin | Video, audio, power, ground, shield, control | Multi-camera DVR and 360 degree systems |
Where the system is a factory-fit unit, the video may be a differential high-definition signal rather than composite, and the run may be a coax or a shielded pair rather than a plain multi-core. State the video format on the order: the jacket, the shielding and the usable length all depend on it.
Identifying the connector on your current cable
- Count the pins on the male face, not the holes in the socket. A photo taken straight into the connector face is usually enough for us to identify the shell.
- Note the thread. M8 circular shells are about 8 mm across the thread; larger aviation style shells are visibly bigger and will not mate.
- Check the exits: straight or right-angle on each end, and which way the angle points when the plug is seated.
- Follow the run. Note whether it crosses a hinge, a grommet or a tow bar, and whether there is a separate trigger wire tapped into the reverse light.
- Photograph any labels on the camera and on the monitor. The model number gets us to the pinout faster than the connector does.
Why the original harness fails
- Hinge flexing. A boot lid or rear door flexes the cable thousands of times a year. The break is almost always just behind the strain relief, where the strands work harden.
- Water wicking. Once the jacket is nicked, water travels along the conductors by capillary action and corrodes the contacts from the inside. The picture starts to flicker in wet weather long before it fails outright.
- A short run pulled tight. Aftermarket cameras are often fitted with a cable that is 200 mm too short, so it lives under tension and tears at the first pothole.
- Pressure washing. A jet aimed at a tailgate seal drives water past an unsealed shell that was fine in rain.
- Trailer and tow bar connectors get dropped, dragged and stood on. On those runs we would quote a PUR jacket and a sealed shell.
Fitting and verifying a replacement
- Disconnect the battery before you unplug anything on a CAN-equipped vehicle.
- Route the new run dry first, without trimming, and check the length at full door or tailgate travel.
- Leave a drip loop at the lowest point so water runs away from the connector rather than into it.
- Seat the coupling nut by hand, then a quarter turn with a tool. Overtightening cracks the shell and is a common cause of a seal that fails a month later.
- Test the picture, then the trigger: select reverse and confirm the monitor switches automatically.
- Check again after a wash, not just in the workshop.
Most rear-view systems use a composite video feed carried on a single conductor plus its return, or one of the analog high-definition formats over the same style of cable. If you want the background, the backup camera article covers how the signal gets from the lens to the screen.
Typical Applications for This Vehicle Rear Camera Extension Cable
- Car, van and pickup reverse cameras feeding a dash monitor or mirror display
- Truck and trailer rear and side cameras on multi-camera DVR systems
- Bus and coach reversing aids, including runs through the rear bulkhead
- Agricultural and construction machines where the camera sits on a moving linkages
- Fleet retrofits replacing a damaged original harness section
How to specify your build
- Pin count and shell, plus a photo of the connector face.
- Pinout if you have it; the camera and monitor model numbers if you do not.
- Video format: composite, or one of the analog high-definition standards.
- Length, measured along the actual route including hinge slack.
- Exits: straight or right-angle on each end.
- Jacket: PVC for interior runs, PUR for door, tailgate and exterior runs.
- Quantity, and whether this is a prototype or a production order.
Workmanship and testing
Assembly and inspection follow IPC/WHMA-A-620 Class 3 workmanship criteria under our ISO 9001 quality management system, and every unit passes 100% continuity and pinout testing before it is packed. Conductor range is 32 to 12 AWG. Where an ingress rating is specified we can quote seal testing on the production batch. Any rating quoted for the M8 interface itself is the industry-standard value for that shell size; the values your assembly is built and verified to are the ones stated on your drawing.
Material declarations against RoHS and REACH are issued per project, alongside the dimensional and electrical reports agreed at quotation; see certifications, compliance and material declarations. Where your drawing names a UL style or another approval, the build follows your drawing and ships with the supporting document rather than a claim of our own. Production runs on the same lines described under cable assembly and wire harness production, where cutting, termination, molding and 100 percent electrical verification sit under one roof. The wider context is covered under cable assemblies for automotive and EV. Tooling for this build is cut in our own tool room and belongs to your program, so a repeat run years later starts from the same tool.
Custom builds and ordering
Vehicle Rear Camera lots run from 1 to 50 pcs, out in 3 working days; volume starts at MOQ 500 pcs shipping 14 working days after approval. Tooling not already held adds around 10 working days. Vehicle orders go out under your part number and labeling, OEM or ODM, and material certificates and first-article reports can be supplied. We hold 100 sets of mold tooling in house, so a standard shell costs no tooling time.
Related automotive video and power assemblies
Most rear camera jobs also need power at the front of the vehicle and a video feed at the head unit. These sit alongside this build in the same harness family:
- M8 Circular 8-Pin to OBDII Dash Camera Power and Video Cable
- OBD2 Dashcam Power Cable with Low-Voltage Cutoff
- HDMI Type E Automotive Cable
- Car Dashboard Flush Mount USB and HDMI Extension Cable
- USB 2.0 A to Mini-B Latch-Lock Cable for Automotive Camera and GPS
- J1939 9-Pin Y Splitter Cable for ELD and GPS Trackers
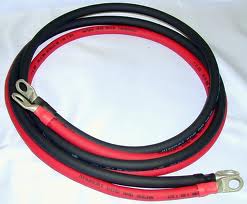
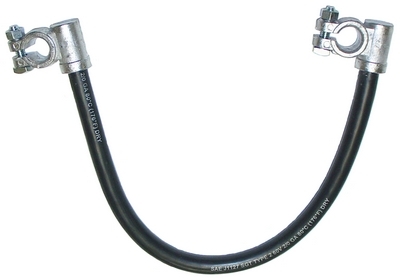
- Heavy-Duty Battery Power Cable with Ring Terminals
Full range: automotive cable and wire harnesses.
Replacement Questions
Will this fit my camera?
Send a photo of the connector face and the camera label. The pin count and keyway identify the shell; the pinout has to come from your device, and we build to that rather than to a guess.
Can I run it through the tailgate grommet?
Yes, with the right exit angle and a PUR jacket. Tell us the bend radius at the hinge and we will place the strain relief to suit it.
Why does the picture flicker only when it rains?
Water has got into the connector or a cracked shell. Replace the run and add a drip loop; a sealant sleeve on its own rarely lasts.
Do I need the trigger wire?
Only if the monitor is meant to switch to the camera automatically when you select reverse. Say so on the order and the conductor goes in.
What is the minimum order?
Vehicle Rear Camera lots run from 1 to 50 pcs, out in 3 working days; volume starts at MOQ 500 pcs shipping 14 working days after approval.
| Connector family | M8 series circular, to order |
|---|---|
| Pin count | 4, 5, 6 or 8 positions |
| Ends | Male to female extension, straight or right-angle either end |
| Cable | Shielded or unshielded, built for composite or analog HD video |
| Jacket | PVC standard; PUR for door, tailgate and engine bay runs |
| Length | OEM build to order, typical 0.5 to 10 m |
| Ingress | IP67 in the mated state on sealed M8 variants |
| Marking | Your part number printed on the overmold |